Blog

  • Chicken and Green Bean Stir Fry

    Chicken and Green Bean Stir Fry

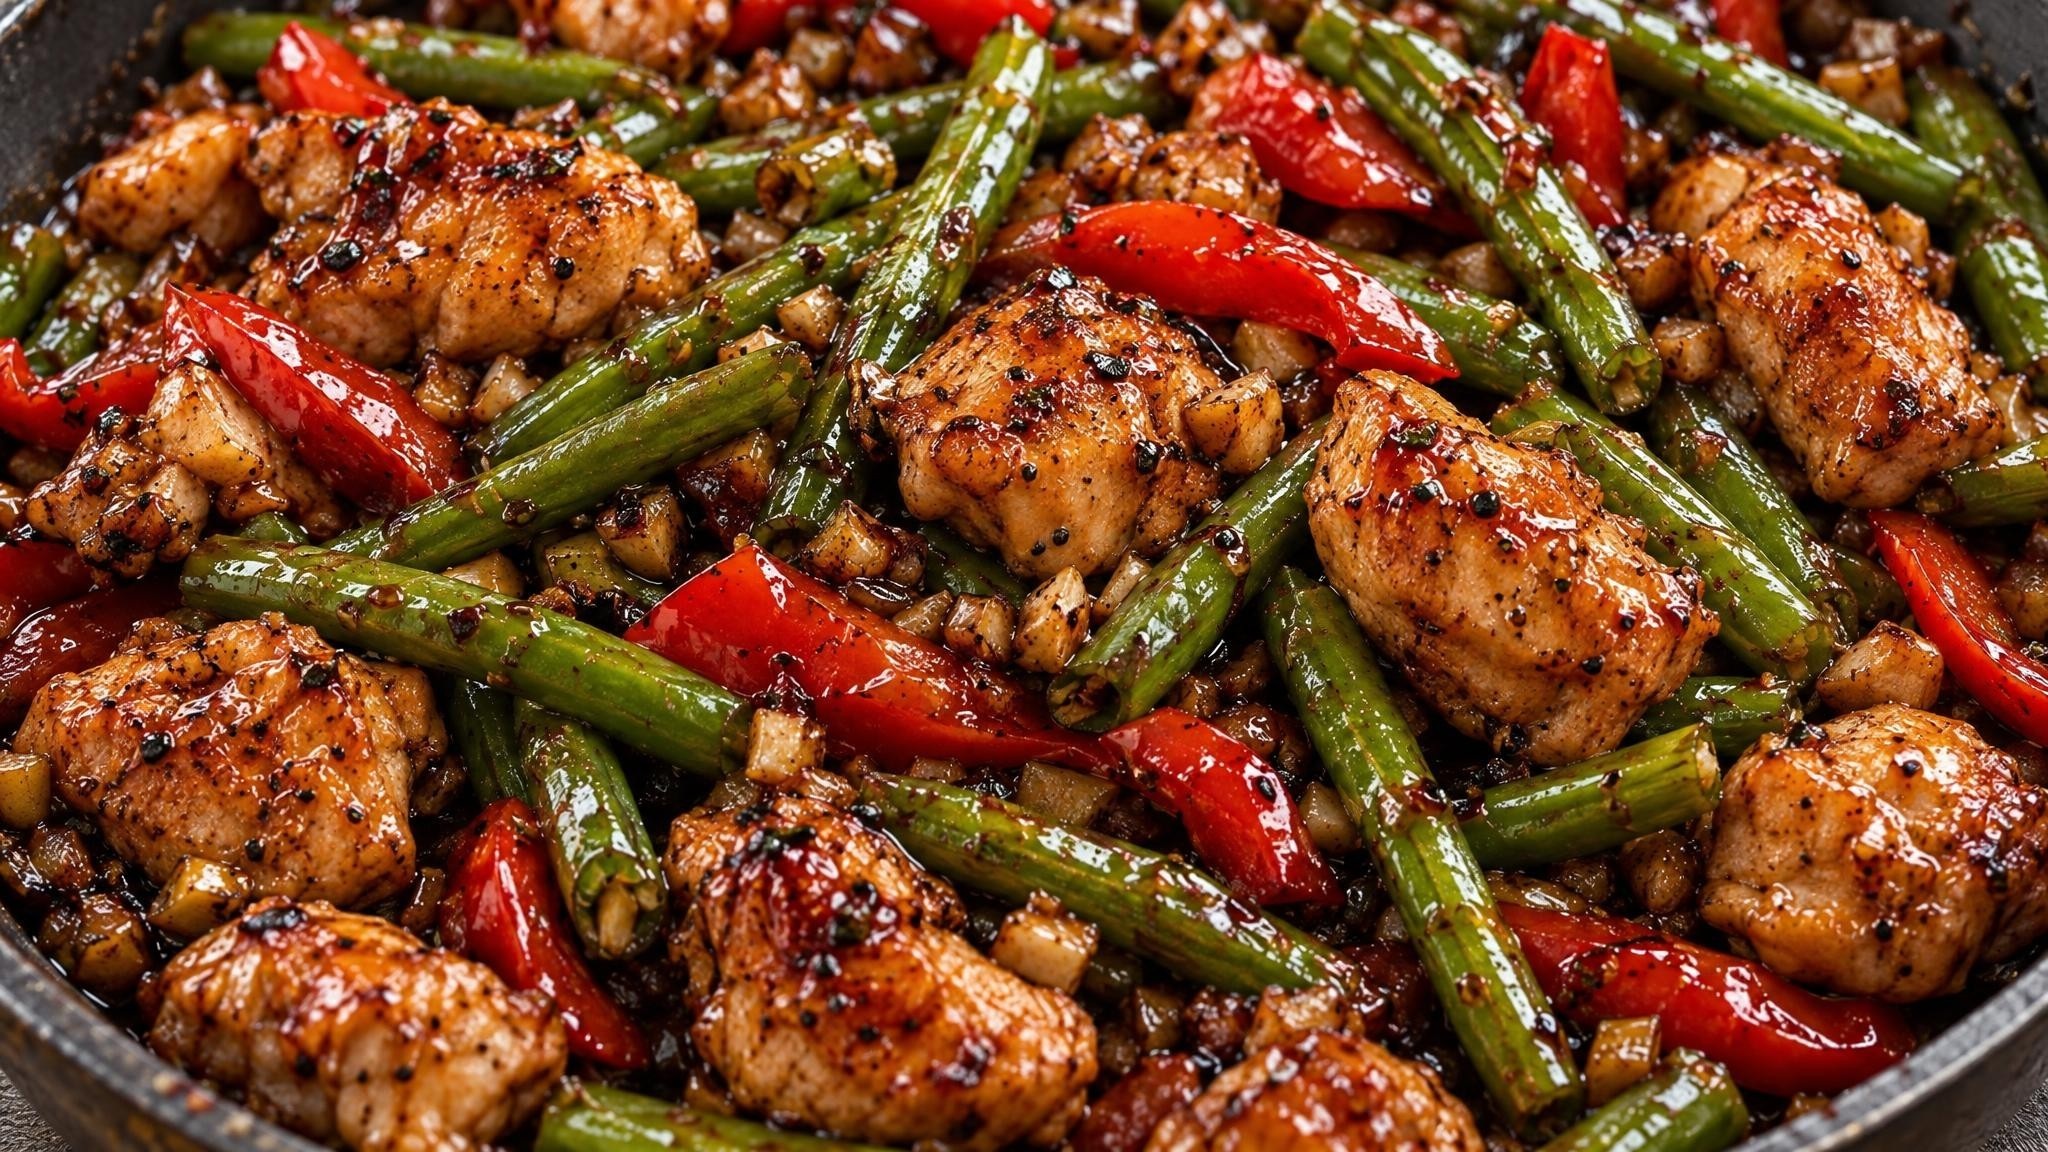
    You get a fast, savory dinner with crisp-tender green beans, juicy chicken, and a glossy sauce that coats every bite. The key is to keep the pan hot enough for browning while moving through each step without delay. If you want the vegetables to stay bright and the sauce to cling instead of pool, cook in stages and return the chicken only at the end. Serve it as soon as the sauce thickens for the best texture.

    Keep the chicken coated and the pan hot

    Tossing the chicken with cornstarch before it hits the skillet helps it brown quickly and gives the sauce something to cling to later. Make sure the pieces are in a single layer when they go into the pan; if they are crowded, they steam instead of sear. Use medium-high heat and let the chicken cook undisturbed for a short stretch before turning so you get better color. If your skillet runs small, cook the chicken in two batches for even browning.

    Cook the vegetables just until crisp-tender

    The green beans should stay bright and still have a little bite, so keep their stir-fry time short. A few blistered spots are a good sign that the pan is hot enough, but they should not soften all the way through before the bell pepper goes in. Add the garlic and ginger only near the end of the vegetable cooking time so they stay fragrant instead of bitter. If you like more heat, increase the red pepper flakes slightly rather than extending the sauce cook time.

    Adjust the sauce for balance

    The sauce should taste salty, sweet, and lightly tangy before it goes into the pan. If you want a sweeter finish, add a little extra honey; if you prefer a sharper edge, add a small splash more rice vinegar. For a thinner coating, stir in a tablespoon or two of water before cooking; for a thicker glaze, let it reduce for the full minute or two after adding it to the skillet. The sauce thickens quickly once it hits the hot pan, so keep tossing the ingredients to avoid sticking.

    Serve and store smartly

    Serve the stir fry over hot steamed rice so the sauce has something to soak into. Leftovers keep well in an airtight container in the refrigerator for up to 3 days. Reheat gently in a skillet over medium heat with a splash of water to loosen the sauce, or microwave in short bursts until just hot. For the best texture, avoid overcooking during reheating, because the green beans will soften further.

    Also worth a try

    Chicken and Green Bean Stir Fry

    Prep Time 15 minutes
    Cook Time 12 minutes
    Total Time 27 minutes
    Servings: 4 servings

    Ingredients
      

    • 680 g boneless chicken thighs cut into 2.5 cm pieces
    • 3 tbsp cornstarch
    • 1/2 tsp salt
    • 1/4 tsp black pepper
    • 3 tbsp vegetable oil divided
    • 340 g green beans trimmed
    • 1 piece red bell pepper sliced into strips
    • 4 cloves garlic minced
    • 1 tbsp fresh ginger grated
    Sauce
    • 60 ml soy sauce
    • 30 ml oyster sauce
    • 30 ml honey
    • 15 ml rice vinegar
    • 5 ml sesame oil
    • 1/2 tsp red pepper flakes
    • 60 ml water

    Method
     

    1. Toss the chicken with cornstarch, salt, and black pepper until evenly coated.
    2. Whisk the soy sauce, oyster sauce, honey, rice vinegar, sesame oil, red pepper flakes, and water in a small bowl.
    3. Heat 2 tablespoons of the vegetable oil in a large skillet or wok over medium-high heat.
    4. Add the chicken in a single layer and cook for 5 to 6 minutes, turning as needed, until golden and cooked through to 74°C.
    5. Transfer the chicken to a plate.
    6. Add the remaining 1 tablespoon oil to the pan, then add the green beans and stir-fry for 4 minutes until bright green with a few blistered spots.
    7. Add the bell pepper and cook for 2 minutes more.
    8. Stir in the garlic and ginger and cook for 30 seconds until fragrant.
    9. Return the chicken to the pan, pour in the sauce, and toss for 1 to 2 minutes until thick and glossy.
    10. Serve immediately over steamed rice.

    Notes

    Cut the chicken into even pieces so it cooks at the same pace. If your pan is small, cook the chicken in batches to avoid steaming. Leftovers keep in the refrigerator for up to 3 days and reheat best with a splash of water.

    Note: the images in this post were created with AI (illustrative images).

  • Original Old Bay Crab Cakes

    Original Old Bay Crab Cakes

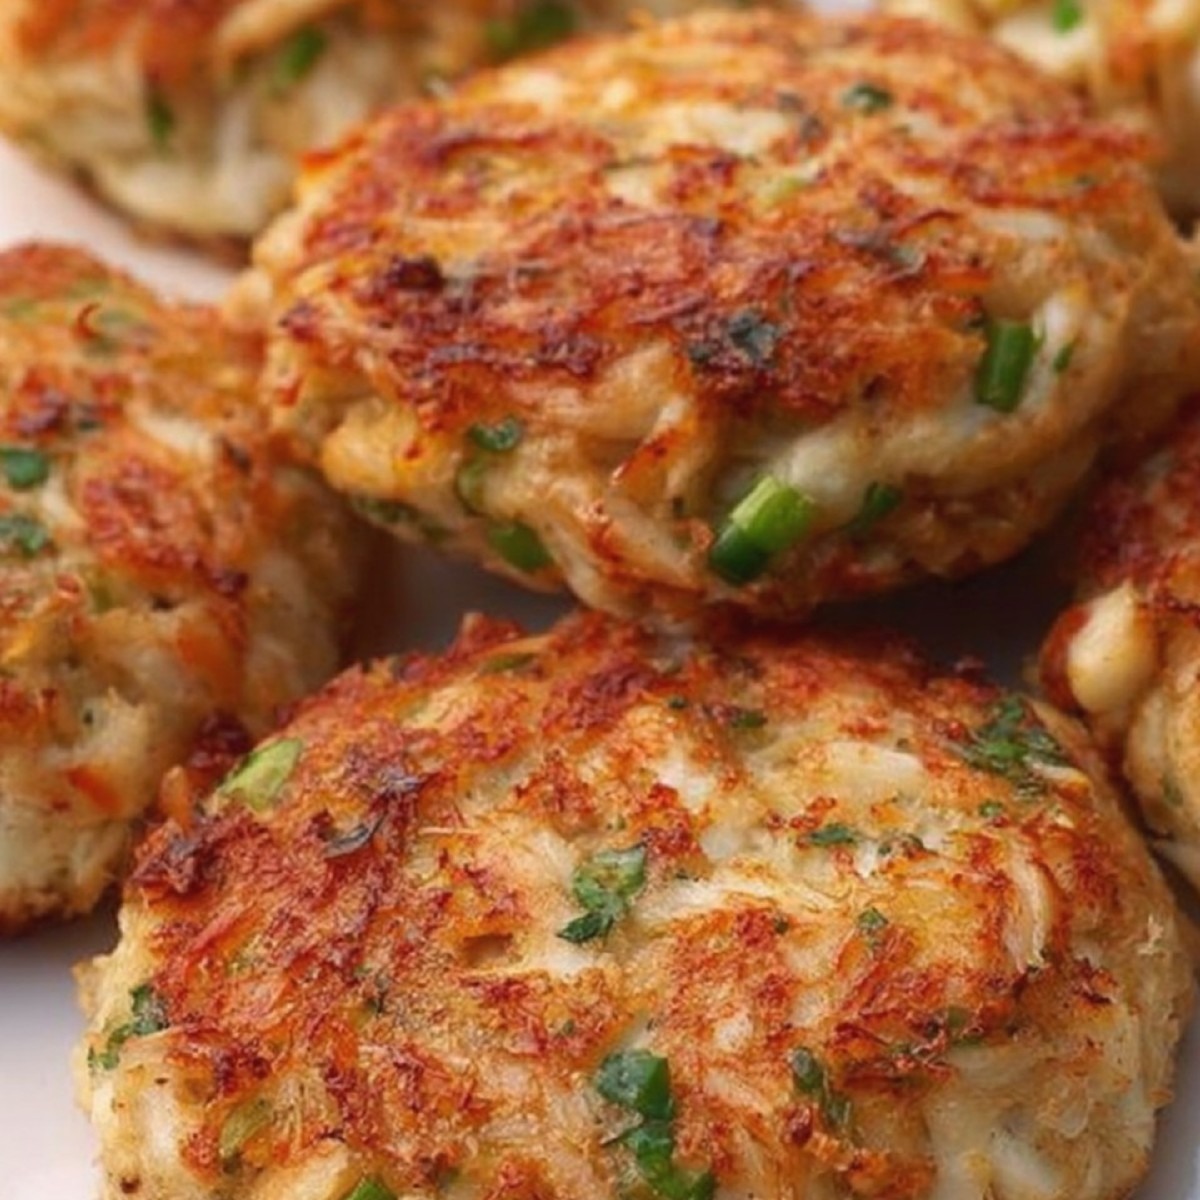
    If you want crab cakes with a crisp outside and a tender, chunky center, keep the crab pieces intact and mix the filling just enough to hold together. The Old Bay, Dijon, lemon, and Worcestershire bring a bold savory flavor, while parsley and green onion keep it fresh. Chilling the cakes before frying helps them stay compact in the pan. Serve them as a starter, on a platter, or with a simple salad and lemon wedges.

    How to keep the crab cakes tender

    Use lump crab meat and handle it gently so you keep the larger pieces that give the cakes their texture. When you fold the mixture together, stop as soon as the ingredients are combined; overmixing breaks up the crab and can make the cakes dense. If the mixture feels too loose to shape, add a little more breadcrumb, 1 tablespoon at a time, just until it holds. A short chill also helps the cakes firm up so they brown evenly instead of spreading in the skillet.

    Pan-frying for a crisp crust

    Medium heat works best here because the outside should turn golden without burning before the center is hot. Melted butter adds flavor, while the vegetable oil helps keep the butter from browning too quickly. Leave space between the cakes so you can turn them cleanly and keep the crust intact. If the pan starts to darken too fast, lower the heat slightly and finish the cakes more slowly.

    Make-ahead, storage, and reheating

    You can shape the crab cakes up to 1 day ahead and keep them covered in the refrigerator until ready to cook. Cooked crab cakes keep well in the fridge for up to 2 days in an airtight container. Reheat them in a skillet over low to medium heat for a few minutes per side so the crust stays crisp, or warm them in a 175°C oven for about 10 minutes. Avoid microwaving if you want to preserve the texture.

    Easy serving ideas

    Serve the crab cakes with lemon wedges, a simple green salad, or a dipping sauce based on mayonnaise and lemon. For a lighter meal, place one or two cakes over greens or roasted vegetables. If you want more heat, add a pinch of cayenne or a few dashes of hot sauce to the wet mixture. For a milder version, reduce the Old Bay slightly and let the lemon and herbs do more of the work.

    Original Old Bay Crab Cakes

    Prep Time 15 minutes
    Cook Time 12 minutes
    30 minutes
    Total Time 57 minutes
    Servings: 6 cakes

    Ingredients
      

    • 450 g lump crab meat picked over for shell bits
    • 1 piece large egg
    • 120 ml mayonnaise
    • 15 ml Dijon mustard
    • 15 ml Worcestershire sauce
    • 5 ml Old Bay seasoning
    • 5 ml lemon juice
    • 30 ml chopped parsley
    • 30 ml sliced green onion
    • 60 ml plain breadcrumbs
    • 30 ml melted butter
    • 15 ml vegetable oil

    Method
     

    1. Pick through the crab meat gently and remove any shell pieces.
    2. In a large bowl, whisk together the egg, mayonnaise, Dijon mustard, Worcestershire sauce, Old Bay seasoning, lemon juice, parsley, and green onion.
    3. Fold in the crab meat and breadcrumbs just until combined, then shape the mixture into 6 cakes.
    4. Cover and chill the cakes for 30 minutes so they hold together better when cooked.
    5. Heat the butter and vegetable oil in a skillet over medium heat.
    6. Cook the crab cakes for 3 to 4 minutes per side until golden brown and heated through.
    7. Transfer the cakes to a plate and serve warm.

    Notes

    Handle the mixture gently to keep the crab in large pieces. If the cakes seem too soft to shape, add a little more breadcrumb. For a sharper finish, serve with lemon wedges.

    Note: the images in this post were created with AI (illustrative images).

  • Joe’s Crab Shack Crab Cakes

    Joe’s Crab Shack Crab Cakes

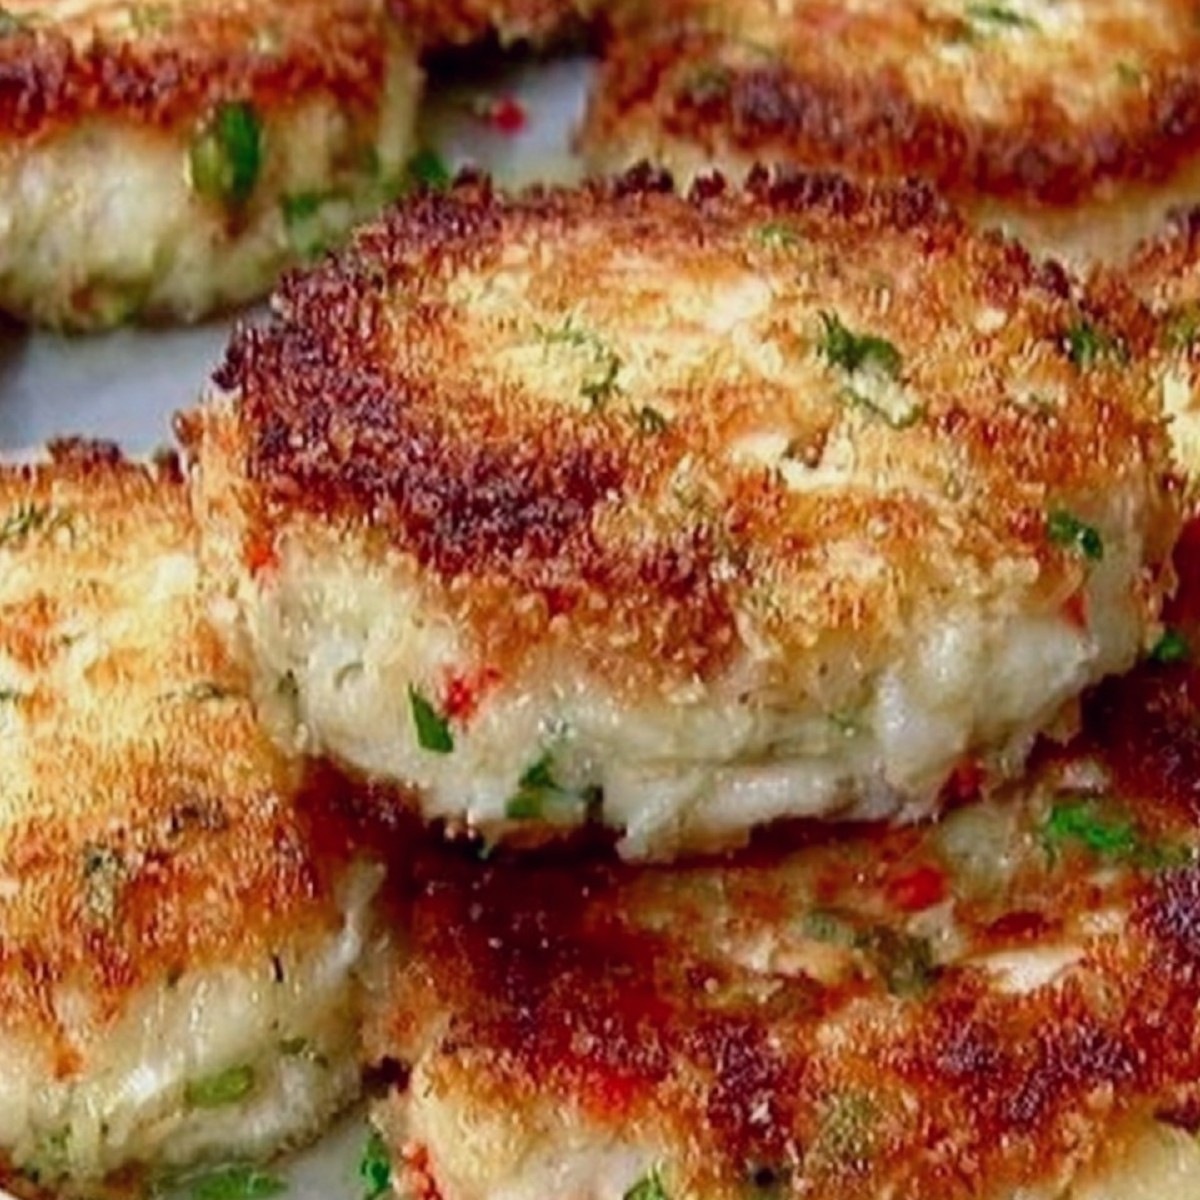
    If you want crab cakes with a crisp crust and a tender center, focus on gentle handling and a short chill before frying. The crab should stay in visible lumps so the cakes hold a sweet, meaty bite instead of turning dense. The binder needs to be mixed just enough to bring everything together, then the skillet has to be hot enough to brown the outside without drying out the crab. Serve them warm with lemon for a bright finish.

    How to keep the crab cakes tender

    Pick through the crab meat carefully and remove any shell pieces without breaking up the lumps more than necessary. The less you work the crab, the more texture you keep in the finished cakes. When you combine the filling, mix the wet ingredients, herbs, vegetables, breadcrumbs, and flour first, then fold in the crab at the end so the pieces stay intact.

    If the mixture feels soft, chill it for the full 20 minutes before shaping or frying. That rest helps the cakes firm up and makes them easier to move into the skillet. For smaller cakes, divide the mixture into 8 portions instead of 7 and reduce the frying time slightly.

    Frying for a crisp golden crust

    Use a large skillet and heat the butter and vegetable oil over medium heat so the cakes brown evenly without burning. The butter adds flavor, while the oil helps prevent scorching. Place the cakes in the pan with space between them; overcrowding drops the temperature and can make the coating soft instead of crisp.

    Cook each side for 3 to 4 minutes, just until deep golden. If the pan browns too quickly, lower the heat slightly after the first side. Let the cakes drain briefly on paper towels or a rack before serving so the crust stays crisp.

    Serving, storage, and make-ahead tips

    Serve the crab cakes warm with lemon wedges so the citrus brightens the rich crab flavor. A simple salad, roasted potatoes, or coleslaw works well alongside them without overpowering the cakes. For a dipping sauce, keep it light and tangy so the crab still leads the plate.

    You can shape the cakes up to 6 hours ahead and keep them covered in the refrigerator until cooking. Leftovers keep for up to 2 days in the fridge in an airtight container. Reheat them in a skillet over low to medium heat or in a 180°C oven for 8 to 10 minutes so the outside stays crisp.

    Joe’s Crab Shack Crab Cakes

    Prep Time 20 minutes
    Cook Time 8 minutes
    20 minutes
    Total Time 48 minutes
    Servings: 7 cakes

    Ingredients
      

    • 450 g lump crab meat picked over for shell pieces
    • 1 stück egg beaten
    • 60 g mayonnaise
    • 1 TL Dijon mustard
    • 1 TL Worcestershire sauce
    • 1 TL Old Bay seasoning
    • 1 EL lemon juice
    • 2 EL parsley chopped
    • 2 EL red bell pepper finely diced
    • 2 EL celery finely diced
    • 60 g fine breadcrumbs
    • 2 EL all-purpose flour
    • 2 EL butter
    • 2 EL vegetable oil

    Method
     

    1. Pick through the crab meat carefully and remove any shell pieces while keeping the lumps as intact as possible.
    2. In a large bowl, mix the egg, mayonnaise, Dijon mustard, Worcestershire sauce, Old Bay seasoning, lemon juice, parsley, red bell pepper, celery, breadcrumbs, and flour until evenly combined.
    3. Fold in the crab meat gently so the pieces stay in chunks rather than breaking apart.
    4. Shape the mixture into 7 cakes and chill them for 20 minutes to help them firm up.
    5. Heat the butter and vegetable oil in a large skillet over medium heat.
    6. Fry the crab cakes for 3 to 4 minutes per side until deep golden and crisp.
    7. Drain briefly on paper towels or a rack, then serve warm with lemon wedges.

    Notes

    For the best texture, keep the heat at medium and avoid pressing the cakes in the pan. If the mixture feels loose, add a little more breadcrumbs, 1 tablespoon at a time, before chilling. Leftovers keep in the refrigerator for up to 2 days.

    Note: the images in this post were created with AI (illustrative images).
  • Crab Cake Egg Rolls with Spicy Dipping Sauce

    Crab Cake Egg Rolls with Spicy Dipping Sauce

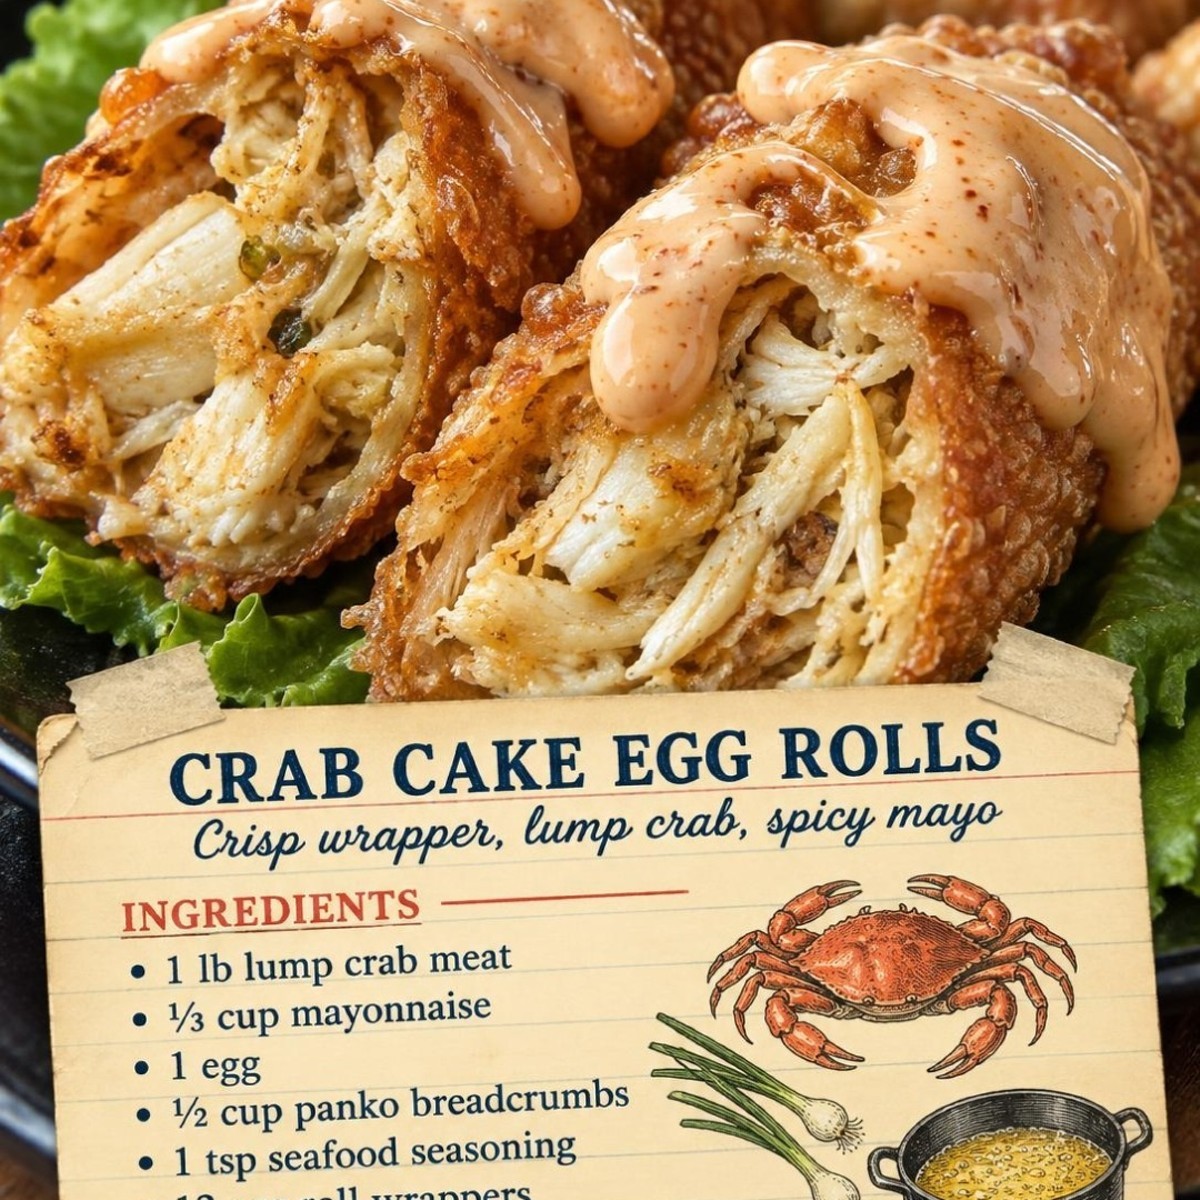
    If you want a crispy appetizer with a soft, crab-filled center, these crab cake egg rolls give you both in one bite. The wrapper turns deeply golden while the filling stays rich, savory, and lightly seasoned. Keep the crab in large pieces, roll the wrappers tightly, and fry in steady oil so the shells stay crisp instead of greasy. A quick sriracha-mayo sauce adds heat and brightness for serving.

    How to keep the crab filling tender

    The filling works best when you mix the binder first, then fold in the crab at the end. That keeps the lumps of crab meat intact and gives you a texture closer to crab cakes than a spreadable paste. Use just enough panko to help the mixture hold together; too much will make the filling dry and dense. If your crab seems very moist, let it drain briefly before mixing so the wrappers do not soften while you roll.

    Rolling and sealing for even frying

    Place each wrapper with a corner facing you so the filling can be tucked in cleanly. A little water on the final flap is enough to seal the roll, and rolling tightly helps prevent oil from slipping inside. Keep the filling portion to about 1/3 cup so the wrappers close without tearing. If a wrapper cracks, replace it rather than patching it, because a damaged seam can open during frying.

    Frying, draining, and serving

    Use enough oil to come about 2 inches up the pot and keep the temperature around 350°F / 175°C for an even crust. Fry only a few egg rolls at a time so the oil temperature stays steady. Turn them once during cooking and drain them on a rack, not paper towels, so the bottoms stay crisp. Serve them soon after frying while the shell is still audibly crunchy and the crab filling is hot.

    Make-ahead and storage tips

    You can mix the sauce up to 3 days ahead and keep it covered in the refrigerator at 4°C. The assembled, uncooked egg rolls can be refrigerated for up to 4 hours before frying, but longer chilling can soften the wrappers. Leftover fried egg rolls keep for 2 days in the fridge; reheat them in a 190°C oven for 8 to 10 minutes to bring back some crispness. Freezing is not ideal for the finished rolls because the wrapper texture changes after thawing.

    Also worth a try

    Crab Cake Egg Rolls

    Prep Time 25 minutes
    Cook Time 15 minutes
    Total Time 40 minutes
    Servings: 6 egg rolls

    Ingredients
      

    Filling
    • 450 g lump crab meat picked over for shells
    • 80 ml mayonnaise
    • 1 piece egg lightly beaten
    • 1 tsp Dijon mustard
    • 1 tsp Worcestershire sauce
    • 1 tsp seafood seasoning plus more if needed
    • 30 g panko breadcrumbs
    • 2 stalks green onions sliced
    Wrapper and frying
    • 12 pieces egg roll wrappers
    • 500 ml oil for frying enough for about 2 inches in the pot
    Sauce
    • 80 ml mayonnaise
    • 1 tbsp sriracha
    • 1 tsp lemon juice
    • 1/2 tsp seafood seasoning

    Method
     

    1. In a large bowl, stir together the mayonnaise, egg, Dijon mustard, Worcestershire sauce, and seafood seasoning until smooth.
    2. Fold in the panko, green onions, and crab meat gently so the crab stays in large pieces.
    3. Lay one egg roll wrapper on a clean work surface with a corner facing you.
    4. Place about 1/3 cup of filling near the corner, fold the corner over the filling, fold in the sides, and roll tightly toward the top point.
    5. Moisten the final corner with a little water and press to seal. Repeat with the remaining wrappers and filling.
    6. Heat about 2 inches of oil in a heavy pot to 175°C (350°F).
    7. Fry 3 to 4 egg rolls at a time for 3 to 4 minutes, turning once, until deep golden and crisp. Drain on a rack.
    8. Stir together the mayonnaise, sriracha, lemon juice, and seafood seasoning until smooth, then cut the egg rolls in half and spoon the sauce over the top.

    Notes

    Keep the oil temperature steady for the crispiest wrapper. Do not overmix the crab filling, or the texture will become pasty. Serve immediately after frying for the best crunch.

    Note: the images in this post were created with AI (illustrative images).

  • Beef Stew with Red Wine, Potatoes, and Pearl Onions

    Beef Stew with Red Wine, Potatoes, and Pearl Onions

    Do you want a stew with deep gravy, tender beef, and vegetables that still hold their shape? The key is to brown the meat well and give the braise enough time to soften the chuck slowly. You should also add the potatoes and carrots later so they finish with texture instead of turning mushy. Let the finished pot rest briefly before serving so the sauce settles and clings to the beef.

    Brown the Beef for Deeper Flavor

    Pat the beef dry before it hits the flour, because excess surface moisture makes browning slower and lighter. A dark crust builds the savory base of the stew, so take the time to sear the meat in batches instead of crowding the pot. Three to four minutes per side is enough to color the exterior without cooking the centers through.

    After each batch, set the beef aside while you work on the onions. The browned bits left in the pot are valuable flavor, and they will dissolve into the sauce once the wine goes in. That small step gives the stew its rich, layered taste without needing extra ingredients.

    Build a Rich Braising Liquid

    Cook the onion until it softens before adding the garlic and tomato paste. This keeps the garlic from scorching and allows the paste to darken slightly, which removes its raw edge. When you pour in the wine, scrape the bottom of the pot well so every browned bit ends up in the sauce.

    After the wine simmers for a couple of minutes, add the broth, Worcestershire sauce, thyme, bay leaves, and beef. The liquid should taste bold before it goes into the oven, because the braise concentrates everything as it cooks. If you want a slightly deeper wine note, you can use the full cup listed and let it reduce for the full 2 minutes before adding the broth.

    Time the Vegetables So They Stay Intact

    Add the carrots, baby red potatoes, and pearl onions after the beef has already braised for 1 1/2 hours. That timing gives the chuck a head start while keeping the vegetables from collapsing. Cut the carrots into even pieces so they finish at the same rate, and keep the potatoes small or halved only if they are unusually large.

    The stew is ready when the beef breaks apart with a fork and the gravy coats a spoon. If the sauce looks a little loose at the end, let the pot stand uncovered for a few minutes off the heat. That short rest helps the gravy thicken naturally without overcooking the vegetables.

    Storage, Reheating, and Make-Ahead Notes

    Cool leftovers before covering and refrigerating them for up to 4 days. The flavor often deepens after a night in the fridge, and the texture usually improves once the gravy has had time to settle. For longer storage, freeze portions for up to 3 months in airtight containers, leaving a little space at the top.

    Reheat the stew gently on the stove over low to medium heat, stirring occasionally so the bottom does not catch. If the gravy has thickened too much after chilling, loosen it with a splash of broth or water. You can also make the stew a day ahead and reheat it slowly before serving, which gives the flavors even more time to meld.

    Beef Stew with Red Wine, Potatoes, and Pearl Onions

    Prep Time 25 minutes
    Cook Time 2 hours 30 minutes
    10 minutes
    Total Time 3 hours 5 minutes
    Servings: 6 servings

    Ingredients
      

    • 900 g beef chuck cut into 1 1/2-inch cubes
    • 1 tsp salt
    • 1/2 tsp black pepper
    • 2 tbsp all-purpose flour
    • 3 tbsp olive oil
    • 1 piece yellow onion chopped
    • 3 clove garlic minced
    • 2 tbsp tomato paste
    • 240 ml dry red wine
    • 720 ml beef broth
    • 1 tbsp Worcestershire sauce
    • 1 tsp dried thyme
    • 2 piece bay leaves
    • 4 piece carrots cut into 1-inch pieces
    • 450 g baby red potatoes
    • 12 piece pearl onions peeled

    Method
     

    1. Preheat the oven to 165°C (325°F), using conventional top and bottom heat. Pat the beef dry, season it with salt and pepper, and toss it with the flour until lightly coated.
    2. Heat the olive oil in a Dutch oven over medium-high heat. Brown the beef in batches for 3 to 4 minutes per side, then transfer it to a plate.
    3. Reduce the heat to medium. Cook the chopped onion for about 5 minutes until softened, then stir in the garlic and tomato paste and cook for 1 minute more, until the paste darkens.
    4. Pour in the red wine and scrape up the browned bits from the bottom of the pot. Simmer for 2 minutes, then add the beef broth, Worcestershire sauce, thyme, bay leaves, and beef.
    5. Bring the liquid to a simmer, cover the pot, and braise in the oven for 1 hour 30 minutes.
    6. Stir in the carrots, potatoes, and pearl onions. Cover again and return to the oven for 1 hour more, until the beef is fork-tender and the gravy coats a spoon.
    7. Remove the bay leaves, taste and adjust the salt if needed, and let the stew rest for 10 minutes before serving.

    Notes

    For a thicker gravy, let the finished stew stand uncovered for a few minutes before serving. Refrigerate leftovers for up to 4 days or freeze for up to 3 months.

    Note: the images in this post were created with AI (illustrative images).

  • Peach Cobbler Cheesecake with Buttery Crumb Topping

    Peach Cobbler Cheesecake with Buttery Crumb Topping

    If you want a dessert with a cool, creamy center and a warm peach finish, this one delivers both in each slice. The key to a clean texture is a smooth cheesecake batter, fruit that is lightly thickened, and a topping that stays crumbly instead of sinking in. You also need a patient bake and a long chill so the center sets without turning dense. Serve it after dinner, at a weekend table, or anytime peaches are ripe and fragrant.

    Build a crust that stays crisp

    Mix the graham cracker crumbs with the sugar and melted butter until every crumb looks evenly coated. Press the mixture firmly into the pan, especially along the bottom edge, so it bakes into a base that can support the filling. A short pre-bake helps the crust hold together and keeps it from softening too quickly once the peaches and batter go in. Let it cool slightly before adding the filling so the bottom layer stays defined.

    Keep the cheesecake filling smooth

    Beat the cream cheese and sugar until the mixture looks fully blended before you add the eggs. Once the eggs go in, mix just until the batter is smooth, then stop so you do not add extra air. The sour cream gives the filling a softer texture and helps balance the sweetness. If the cream cheese is still cool and firm, let it sit at room temperature first; that small step makes it much easier to get a lump-free batter.

    Make the peach layer and cobbler topping work together

    Toss the peaches with brown sugar, cinnamon, cornstarch, and lemon juice so the juices thicken in the oven instead of running through the cheesecake. Spoon only part of the fruit over the crust before the batter goes in, then finish with the rest so the peaches stay visible on top. For the crumb layer, cut the cold butter into the flour, brown sugar, and cinnamon until the mixture forms coarse pieces. Keep the butter cold so the topping bakes up into distinct crumbs rather than a paste.

    Cool, chill, and store for neat slices

    After baking, let the cheesecake sit in the turned-off oven with the door cracked open for one hour. That slow cooling helps the center finish setting and reduces the chance of cracking. Chill the cake for at least 4 hours before slicing; overnight chilling gives the cleanest cuts. Keep leftovers covered in the refrigerator for up to 4 days. If you want to freeze slices, wrap them tightly and freeze for up to 1 month, then thaw them in the refrigerator before serving.

    Peach Cobbler Cheesecake

    Prep Time 30 minutes
    Cook Time 1 hour 10 minutes
    5 hours
    Total Time 6 hours 40 minutes
    Servings: 10 slices

    Ingredients
      

    Crust
    • 180 g graham cracker crumbs
    • 50 g granulated sugar
    • 85 g unsalted butter melted
    Filling
    • 680 g cream cheese softened
    • 200 g granulated sugar
    • 3 piece large eggs
    • 1 tsp vanilla extract
    • 240 ml sour cream
    Peach layer
    • 450 g sliced peaches
    • 65 g brown sugar
    • 1 tsp cinnamon
    • 2 tbsp cornstarch
    • 1 tbsp lemon juice
    Topping
    • 60 g all-purpose flour
    • 100 g brown sugar
    • 1/2 tsp cinnamon
    • 55 g cold unsalted butter cubed

    Method
     

    1. Heat the oven to 160°C with top and bottom heat. Grease a 23 cm springform pan.
    2. Mix the graham cracker crumbs, granulated sugar, and melted butter until the crumbs are evenly moistened.
    3. Press the mixture firmly into the bottom of the pan and bake for 10 minutes, then let it cool slightly.
    4. Beat the cream cheese and granulated sugar until smooth and creamy.
    5. Mix in the eggs one at a time, then add the vanilla extract and sour cream just until combined.
    6. Toss the sliced peaches with brown sugar, cinnamon, cornstarch, and lemon juice.
    7. Spoon half of the peach mixture over the crust, pour in the cheesecake batter, and top with the remaining peaches.
    8. Mix the flour, brown sugar, and cinnamon for the topping, then cut in the cold butter until the mixture is crumbly.
    9. Scatter the topping over the peaches and bake for 60 to 70 minutes, until the center is almost set.
    10. Turn off the oven, crack the door open, and let the cheesecake sit inside for 1 hour.
    11. Chill for at least 4 hours before serving, then top with peach slices and spoon over any glossy peach sauce.

    Notes

    For the smoothest filling, make sure the cream cheese is softened before mixing. If your peaches are very juicy, let them sit briefly after tossing and avoid adding excess liquid to the pan. Serve chilled, and slice with a warm knife for cleaner pieces.

    Note: the images in this post were created with AI (illustrative images).

  • German Chocolate Cheesecake with Oreo Crust

    German Chocolate Cheesecake with Oreo Crust

    If you want a dessert with deep chocolate flavor, a creamy center, and a rich coconut-pecan finish, this cheesecake delivers all three. The Oreo crust adds a crunchy base that balances the smooth filling and gooey topping. For the best texture, you need a gentle bake and enough chill time so the cake sets cleanly. Serve it when you want a showpiece dessert that slices neatly and tastes even better cold.

    How to get a smooth cheesecake filling

    Start with softened cream cheese so you can beat the filling until it is completely smooth before adding the eggs. This helps you avoid lumps and keeps the texture dense but silky. Melted chocolate should be slightly cooled before mixing it in, because very hot chocolate can affect the batter and create streaks. Mix only until combined once the eggs go in; overmixing adds too much air and can cause cracks during baking.

    Baking and cooling tips

    Bake the cheesecake in a moderate oven, ideally with the pan set on a middle rack, so the edges set before the center overbakes. The middle should still have a slight wobble when you remove it from the oven. Let it cool gradually at room temperature before chilling, because a fast temperature change can lead to cracks. Refrigerate it for at least 6 hours, or overnight if you want cleaner slices and a firmer texture.

    Coconut pecan topping and serving ideas

    Cook the topping until it thickens enough to coat a spoon, then let it cool until just warm so it stays spoonable without running over the cake. If you want extra texture, toast the pecans first for a deeper nutty note. You can spread the topping over the whole cheesecake or serve it in a thick layer only on each slice. For a sharper chocolate contrast, add a small pinch of flaky salt on top just before serving.

    Storage and make-ahead guidance

    Store the finished cheesecake covered in the refrigerator for up to 4 days. Keep the topping on the cake if you want the flavors to meld, or store it separately for a cleaner crust if needed. For longer storage, freeze individual slices without the topping for up to 2 months; wrap them tightly and thaw overnight in the refrigerator. Add the coconut-pecan topping after thawing for the best texture.

    German Chocolate Cheesecake with Oreo Crust

    Prep Time 35 minutes
    Cook Time 1 hour 15 minutes
    7 hours
    Total Time 8 hours 50 minutes
    Servings: 12 slices

    Ingredients
      

    Crust
    • 300 g Oreo cookies finely crushed
    • 75 g unsalted butter melted
    Cheesecake filling
    • 900 g cream cheese softened
    • 200 g granulated sugar
    • 25 g unsweetened cocoa powder
    • 200 g dark chocolate melted and cooled slightly
    • 3 stuck eggs large
    • 120 ml sour cream
    • 1 TL vanilla extract
    Coconut pecan topping
    • 120 g evaporated milk
    • 100 g brown sugar
    • 60 g unsalted butter
    • 2 stuck egg yolks
    • 100 g sweetened shredded coconut
    • 100 g pecans chopped

    Method
     

    1. Preheat the oven to 175°C top/bottom heat and line the base of a 23 cm springform pan with parchment paper.
    2. Mix the crushed Oreo cookies with the melted butter, press the mixture firmly into the bottom of the pan, and bake the crust for 8 minutes.
    3. Beat the cream cheese and sugar until smooth, then mix in the cocoa powder, melted chocolate, sour cream, and vanilla.
    4. Add the eggs one at a time, mixing just until combined after each addition to keep the batter dense and smooth.
    5. Pour the filling over the crust and smooth the surface with a spatula.
    6. Bake the cheesecake for 60 to 65 minutes, until the edges are set and the center still has a slight wobble.
    7. Cool the cheesecake at room temperature for 1 hour, then chill it for at least 6 hours or overnight before adding the topping.
    8. For the topping, cook the evaporated milk, brown sugar, butter, and egg yolks over medium heat for 8 to 10 minutes, stirring constantly until thickened.
    9. Stir in the coconut and pecans, cool the topping until warm, then spread it over the chilled cheesecake before slicing.

    Notes

    Use room-temperature dairy for the filling so the batter mixes evenly. If the cheesecake browns too quickly, loosely cover it with foil during the last part of baking. For the cleanest slices, wipe the knife with warm water between cuts.

    Note: the images in this post were created with AI (illustrative images).

  • Hello world!

    Welcome to WordPress. This is your first post. Edit or delete it, then start writing!